👩💻 자바 개발자 양성과정 64일차
1. 프로젝트의 / (루트경로) 아키텍처 위치
2. Spring 실행 과정
3. 컨트롤러의 리턴타입이 데이터 타입 일때, 객체를 JSON으로 Porting하기
4. 컨트롤러 메소드에 배열 사용하기
5. 컨트롤러 메소드에 데이터 타입 사용하기 + 파라미터 DATE타입으로 인식하기
6. 다이나믹 프로젝트를 MVC프로젝트로 셋팅 변경하기
🍋 프로젝트의 / (루트경로) 아키텍처 위치
여기에서 말하는 /(루트는) \src\main\webapp 해당 경로이다.
🍋 Spring 실행 과정
1. 톰캣 server.xml
\Servers\Tomcat v9.0 Server at localhost-config\server.xml
<Context docBase="MVCdemo" path="/" reloadable="true" source="org.eclipse.jst.jee.server:MVCdemo"/></Host>docBase="MVCdemo" : 실행 시킬 프로젝트 명
path="/" :
reloadable="true"
source="org.eclipse.jst.jee.server:MVCdemo"
2. 프로젝트 내 web.xml
\src\main\webapp\WEB-INF\web.xml
<?xml version="1.0" encoding="UTF-8"?>
<web-app version="2.5" xmlns="http://java.sun.com/xml/ns/javaee"
	xmlns:xsi="http://www.w3.org/2001/XMLSchema-instance"
	xsi:schemaLocation="http://java.sun.com/xml/ns/javaee https://java.sun.com/xml/ns/javaee/web-app_2_5.xsd">

	<!-- [2] 디비연동 일반 스프링 환경설정을 한다.(준비) -->
	<context-param>
		<param-name>contextConfigLocation</param-name>
		<param-value>/WEB-INF/spring/applicationContext.xml</param-value>
	</context-param>

	<!-- [1] 애플리케이션이 실행될 메모리공간을 만들어둔다. -->
	<listener>
		<listener-class>org.springframework.web.context.ContextLoaderListener
		</listener-class>
	</listener>

	<!-- [4] 요청받은 http요청을 유지한채로 HandlerMapping (이하, bean.xml)에 보낸다. -->
	<servlet>
		<servlet-name>appServlet</servlet-name>
		<servlet-class>org.springframework.web.servlet.DispatcherServlet
		</servlet-class>
		<init-param>
			<param-name>contextConfigLocation</param-name>
			<param-value>/WEB-INF/spring/appServlet/beans.xml</param-value>
		</init-param>
		<load-on-startup>1</load-on-startup>
	</servlet>

	<!-- [3] "/" 경로로 웹에 접근하였을때 실행시킬 서블릿을 appServlet로 지정한다.  -->
	<servlet-mapping>
		<servlet-name>appServlet</servlet-name>
		<url-pattern>/</url-pattern>
	</servlet-mapping>

</web-app>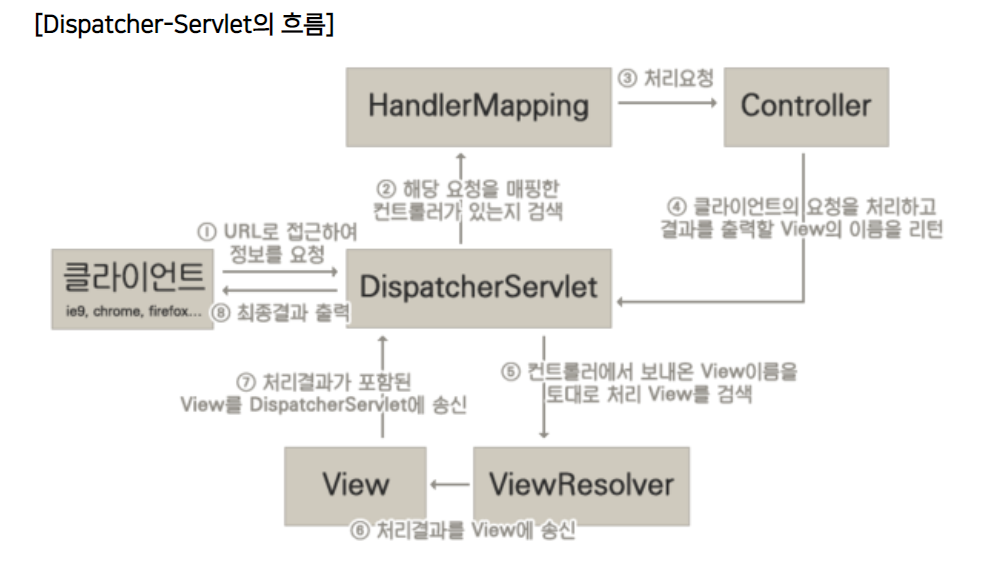
<?xml version="1.0" encoding="UTF-8"?>
<beans:beans xmlns="http://www.springframework.org/schema/mvc"
xmlns:xsi="http://www.w3.org/2001/XMLSchema-instance"
xmlns:beans="http://www.springframework.org/schema/beans"
xmlns:context="http://www.springframework.org/schema/context"
xsi:schemaLocation="http://www.springframework.org/schema/mvc https://www.springframework.org/schema/mvc/spring-mvc.xsd
http://www.springframework.org/schema/beans https://www.springframework.org/schema/beans/spring-beans.xsd
http://www.springframework.org/schema/context https://www.springframework.org/schema/context/spring-context.xsd">
<!-- DispatcherServlet Context: defines this servlet's request-processing infrastructure -->
<!-- Enables the Spring MVC @Controller programming model -->
<annotation-driven />
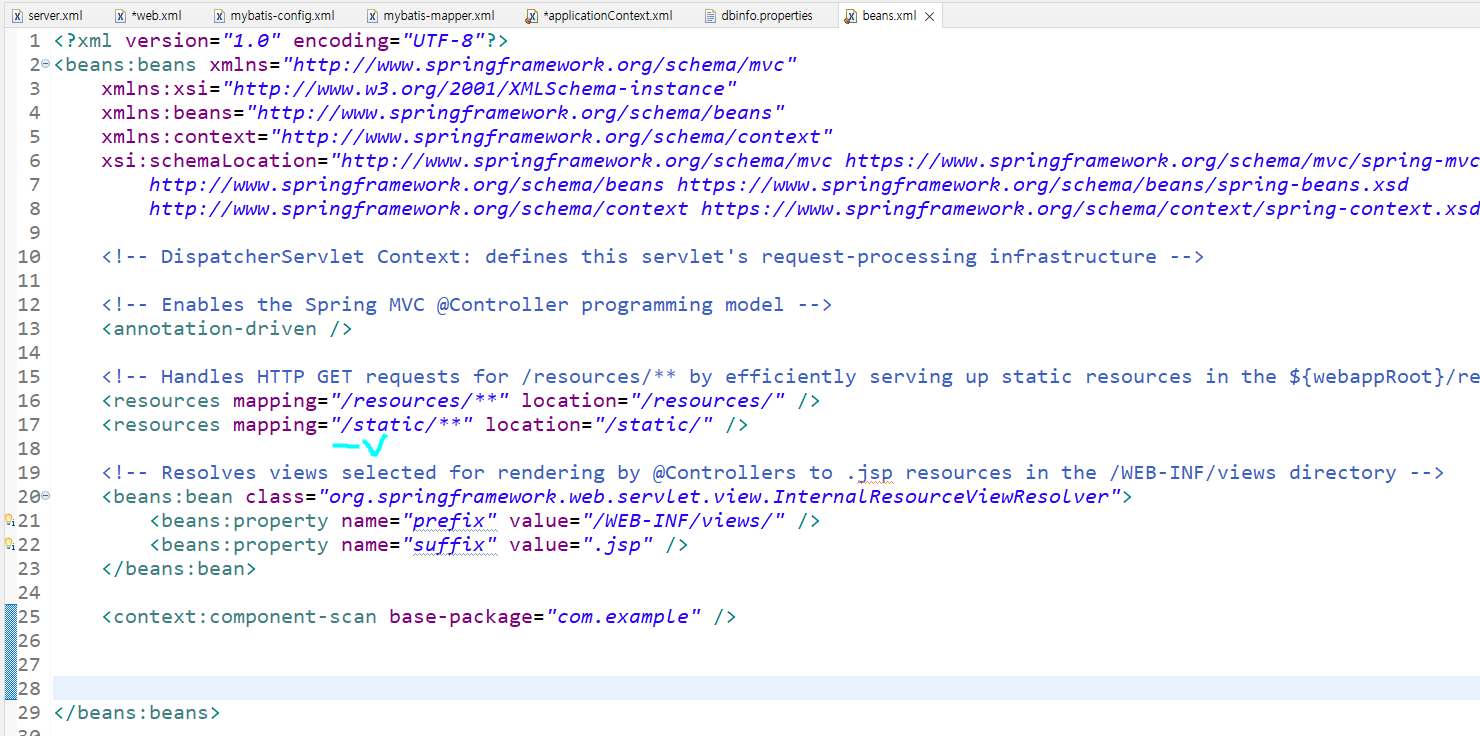
<!-- Handles HTTP GET requests for /resources/** by efficiently serving up static resources in the ${webappRoot}/resources directory -->
<resources mapping="/resources/**" location="/resources/" />
<resources mapping="/static/**" location="/static/" />
<!-- Resolves views selected for rendering by @Controllers to .jsp resources in the /WEB-INF/views directory -->
<beans:bean class="org.springframework.web.servlet.view.InternalResourceViewResolver">
<beans:property name="prefix" value="/WEB-INF/views/" />
<beans:property name="suffix" value=".jsp" />
</beans:bean>
<context:component-scan base-package="com.example" />
</beans:beans>
🍋 컨트롤러의 리턴타입이 데이터 타입 일때, 객체를 JSON으로 Porting하기
Jackson Databind dependency설치
<!-- https://mvnrepository.com/artifact/com.fasterxml.jackson.core/jackson-databind -->
<dependency>
    <groupId>com.fasterxml.jackson.core</groupId>
    <artifactId>jackson-databind</artifactId>
    <version>2.13.0</version>
</dependency>
package com.example.controller;

import org.springframework.stereotype.Controller;
import org.springframework.web.bind.annotation.GetMapping;

import com.example.vo.StudentVO;

@Controller
public class TestController {

// @ResponseBody 로 return을 하면 데이터 타입도 리턴에 가능하다. 리턴은 json형태로 한다.
	@GetMapping("/test")
	public @ResponseBody StudentVO test()
	{
		StudentVO student = new StudentVO();
		student.setName("한지민");
		student.setAge(20);
		return student;
	}
}
🍋 컨트롤러 메소드에 배열 사용하기
package com.example.controller;

import javax.servlet.http.HttpServletRequest;

import org.springframework.stereotype.Controller;
import org.springframework.web.bind.annotation.GetMapping;
import org.springframework.web.bind.annotation.RequestParam;
import org.springframework.web.bind.annotation.ResponseBody;

import com.example.vo.StudentVO;

@Controller
public class TestController {
	//취미의 갯수가 정해져있으면 String[], 갯수가 정해져있지 않으면 ArrayList<String>
    //String[]면 주소에 접속할 때, param?hobby[1]=독서&hobby[2]=등산
    //ArrayList<String>면 주소에 접속할 때, param?hobby=독서&hobby=등산
	@GetMapping("/param")
	public String param(@RequestParam("hobby")String[] hobbies) {
		StudentVO student = new StudentVO();
		student.setName("한지민");
		student.setAge(20);
		return "param";
	}

}
- 취미의 갯수가 정해져있으면 String[], 갯수가 정해져있지 않으면 ArrayList<String>
- String[]면 주소에 접속할 때, param?hobby[1]=독서&hobby[2]=등산
- ArrayList<String>면 주소에 접속할 때, param?hobby=독서&hobby=등산
🍋 컨트롤러 메소드에 데이터 타입 사용하기 + 파라미터 DATE타입으로 인식하기
package com.example.vo;

import lombok.Data;

@Data
public class StudentVO {
	private String name;
	private int age;
}
//파라미터명과 데이터 타입내 이름이 같을때만 사용할 수 있다.
//접속할때, param?name=호야&age=50
@GetMapping("/param")
public void param(StudentVO student) {
	log.info("name"+student.getName());
	log.info("name"+student.getAge());
}
스프링에 들어있는 PropertyEditor라는 기능이 String으로 받아온 age를 int값으로 변환해준다.
단, 문제가 될 수 있는 상황!
package com.example.vo;

import java.util.Date;

import lombok.Data;

@Data
public class StudentVO {
	private String name;
	private int age;
	private Date birthDate;
}
//파라미터명과 데이터 타입내 이름이 같을때만 사용할 수 있다.
//접속할때, param?name=호야&age=50&birthDate=2021-10-10
@GetMapping("/param")
public void param(StudentVO student) {
log.info("name"+student.getName());
log.info("name"+student.getAge());
log.info("name"+student.getBirthDate());
}
birthDate을 받아오는건 String인데, vo에서는 date이기에 데이터 타입 달라 오류가 발생한다.
그래서 DATE타입은 받아오기 전에 미리 데이터 타입을 변경해주어야 한다.
//param 실행전에 먼저 실행되어 받아온 데이터중에 birthDate를 date타입으로 바꾼다.
@InitBinder
public void initBinder(WebDataBinder binder) {
	SimpleDateFormat date = new SimpleDateFormat("yyyy-MM-dd");
	binder.registerCustomEditor(java.util.Date.class, "birthDate", new CustomDateEditor(date, false));
}

//파라미터명과 데이터 타입내 이름이 같을때만 사용할 수 있다.
//접속할때, param?name=호야&age=50&birthDate=2021-10-10
@GetMapping("/param")
public void param(StudentVO student) {
	log.info("name"+student.getName());
	log.info("name"+student.getAge());
	log.info("birthDate"+student.getBirthDate().toString());
}
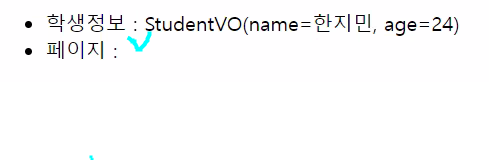
🍋 컨트롤러 메소드에 Model 사용하기 - Model이란?
- Model은 jsp로 넘어갈때 함께 넘어가야하는 데이터를 담는 것
- 사용자가 request할때 담는게 아니라 비즈니스 로직 의해서 시스템에서 추가적으로 담는 객체가 모델임
@GetMapping("/param")
public void param(Model model) {
	StudentVO student = new StudentVO();
	student.setAge(0);
	student.setName("홍길동");
	model.addAttribute("studentInfo",student);
}
🍋 컨트롤러 메소드에 Model 사용하기 - 2 (Model의 별명 지정하기)
사용하는 이유 : 객체로 모든 정보가 다 들어오지 못하는 경우가 있기 때문임
@GetMapping("/param")
public String param1(StudentVO student, int page) {
	log.info(student.toString());
	log.info(Integer.toString(page));
	return "model";
}
param?name=호야&age=50&page=5 페이지로 이동하면

컨트롤러에서 log에 page값이 잘 나타나는데, model.jsp에서는 page값이 출력되지 않는다.
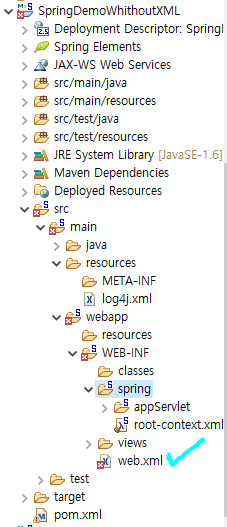
🍋 Spring프로젝트에서 모든 xml을 삭제하기 (Annotation 사용하기)
1. web.xml삭제
2. pon.xml에 아래 코드 추가하기
<plugin>
	<groupId>org.apache.maven.plugins</groupId>
	<artifactId>maven-war-plugin</artifactId>
	<version>3.3.2</version>
	<configuration>
	<!-- web.xml을 찾지도 않게 된다. -->
	<failOnMissingWebXml>false</failOnMissingWebXml>
	</configuration>
</plugin>
3. spring 폴더 채로 삭제

4. config java들 만들기
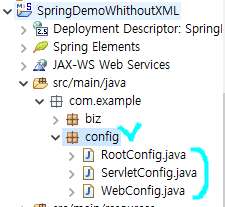
\src\main\java\com\example\config\WebConfig.java
package com.example.config;

import org.springframework.context.annotation.Configuration;
import org.springframework.web.servlet.support.AbstractAnnotationConfigDispatcherServletInitializer;

//configuration이라고 명시해줌
@Configuration
public class WebConfig extends AbstractAnnotationConfigDispatcherServletInitializer{

	//[3]
	@Override
	protected Class<?>[] getRootConfigClasses() {
		return new Class[] {RootConfig.class};
	}

	//[2]
	@Override
	protected Class<?>[] getServletConfigClasses() {
		return new Class[] {ServletConfig.class};
	}

	//[1] url patten을 말함
	//biz의 오른쪽 슬레시를 말하는 것임
	@Override
	protected String[] getServletMappings() {
		return new String[]{"/"};
	}

}
해당 파일 과 같은 기능
\src\main\java\com\example\config\ServletConfig.java
package com.example.config;

import org.springframework.context.annotation.ComponentScan;
import org.springframework.context.annotation.Configuration;
import org.springframework.web.servlet.config.annotation.EnableWebMvc;
import org.springframework.web.servlet.config.annotation.ResourceHandlerRegistry;
import org.springframework.web.servlet.config.annotation.ViewResolverRegistry;
import org.springframework.web.servlet.config.annotation.WebMvcConfigurer;
import org.springframework.web.servlet.view.InternalResourceViewResolver;
import org.springframework.web.servlet.view.JstlView;

@Configuration
@EnableWebMvc
@ComponentScan(basePackages = {"com.example"})
public class ServletConfig implements WebMvcConfigurer{
	@Override
	public void addResourceHandlers(ResourceHandlerRegistry registry) {
		registry.addResourceHandler("/resources/**/").addResourceLocations("/resources/");
		registry.addResourceHandler("/static/**/").addResourceLocations("/static/");
	}

	@Override
	public void configureViewResolvers(ViewResolverRegistry registry) {
		InternalResourceViewResolver bean = new InternalResourceViewResolver();
		bean.setViewClass(JstlView.class);
		bean.setPrefix("/WEB-INF/views/");
		bean.setSuffix(".jsp");
		registry.viewResolver(bean);
	}
}
해당 파일 과 같은 기능
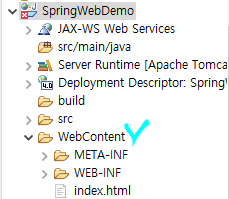
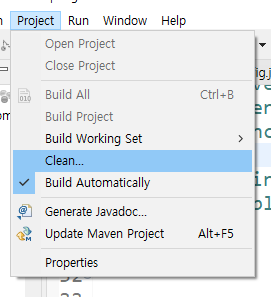
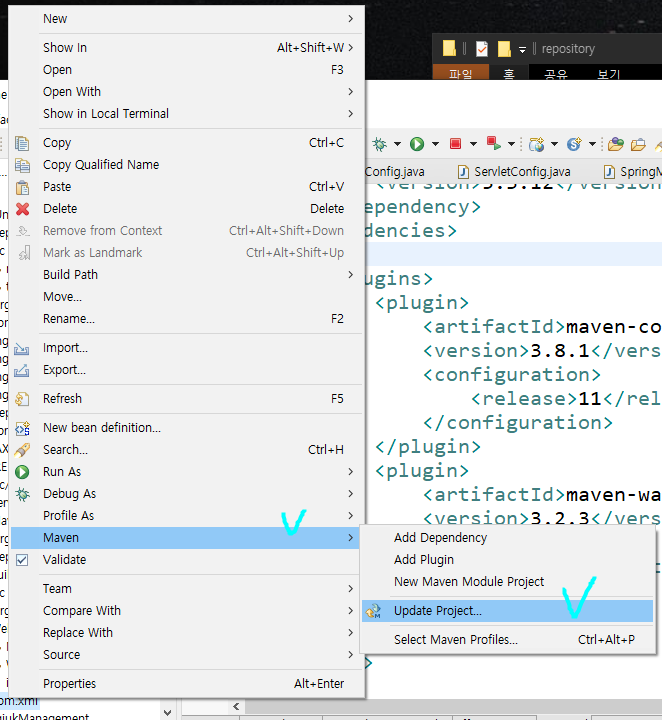
🍋 다이나믹 프로젝트를 MVC프로젝트로 셋팅 변경하기
다이나믹 프로젝트로 MVC프로젝트를 셋팅(=전자 정부 프레임워크)하는 이유
두가지 이유가 있음
1.
애는 애초부터 스프링이 아님
다이나믹 웹임
예전에 JSP로 작업한것 처럼 썼으면 되었음
컨테스터 로더가 없고 디스페처 서브도 없음
우리가 만든 프로젝트를 스프링으로 변환하기 위해서 알려주는 것
(가능 하다는 것을 알려줌)
2.
static/...html 경로의 정적페이지를 사용하는데
다이나믹에서는 정적페이지를 쓰지 않고 사용했었음
이 점을 차용하기 위해서 다이나믹 웹에서 스프링으로 바꾸는 작업을 하는 것임
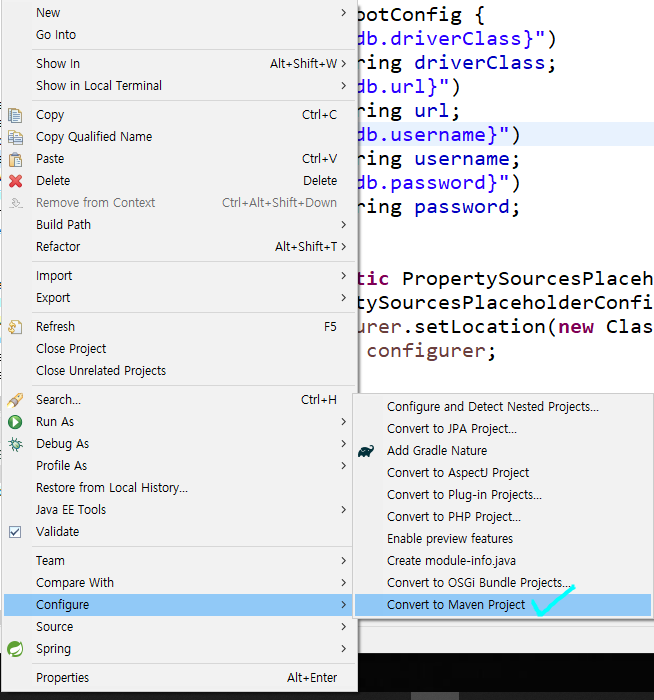
pom.xml
<project xmlns="http://maven.apache.org/POM/4.0.0"
   xmlns:xsi="http://www.w3.org/2001/XMLSchema-instance"
   xsi:schemaLocation="http://maven.apache.org/POM/4.0.0 https://maven.apache.org/xsd/maven-4.0.0.xsd">
   <modelVersion>4.0.0</modelVersion>
   <groupId>SpringWebDemo</groupId>
   <artifactId>SpringWebDemo</artifactId>
   <version>0.0.1-SNAPSHOT</version>
   <packaging>war</packaging>


   <dependencies>
      <dependency>
         <groupId>org.springframework</groupId>
         <artifactId>spring-context</artifactId>
         <version>5.3.12</version>
      </dependency>
      <dependency>
         <groupId>org.junit.jupiter</groupId>
         <artifactId>junit-jupiter-api</artifactId>
         <version>5.8.1</version>
         <scope>test</scope>
      </dependency>
      <dependency>
         <groupId>org.springframework</groupId>
         <artifactId>spring-jdbc</artifactId>
         <version>5.3.12</version>
      </dependency>
      <dependency>
         <groupId>org.springframework</groupId>
         <artifactId>spring-webmvc</artifactId>
         <version>5.3.12</version>
      </dependency>
      <dependency>
         <groupId>javax.servlet</groupId>
         <artifactId>jstl</artifactId>
         <version>1.2</version>
      </dependency>

   </dependencies>

   <build>
      <plugins>
         <plugin>
            <artifactId>maven-compiler-plugin</artifactId>
            <version>3.8.1</version>
            <configuration>
               <release>11</release>
            </configuration>
         </plugin>
         <plugin>
            <artifactId>maven-compiler-plugin</artifactId>
            <version>3.8.1</version>
            <configuration>
               <release>16</release>
            </configuration>
         </plugin>
         <plugin>
            <artifactId>maven-war-plugin</artifactId>
            <version>3.2.3</version>
            <configuration>
               <warSourceDirectory>WebContent</warSourceDirectory>
            </configuration>
         </plugin>
      </plugins>
   </build>
</project>


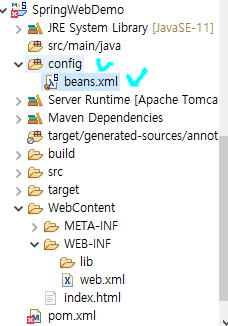
beans.xml에 context추가
<?xml version="1.0" encoding="UTF-8"?>
<beans xmlns="http://www.springframework.org/schema/beans"
	xmlns:xsi="http://www.w3.org/2001/XMLSchema-instance"
	xmlns:context="http://www.springframework.org/schema/context"
	xsi:schemaLocation="http://www.springframework.org/schema/beans http://www.springframework.org/schema/beans/spring-beans.xsd
		http://www.springframework.org/schema/context http://www.springframework.org/schema/context/spring-context-4.3.xsd">

	<context:component-scan base-package="com.example"></context:component-scan>
	<bean id="helloVO" class="com.example.vo.HelloVO">
		<property name="name" value="한지민" />
	</bean>

</beans>
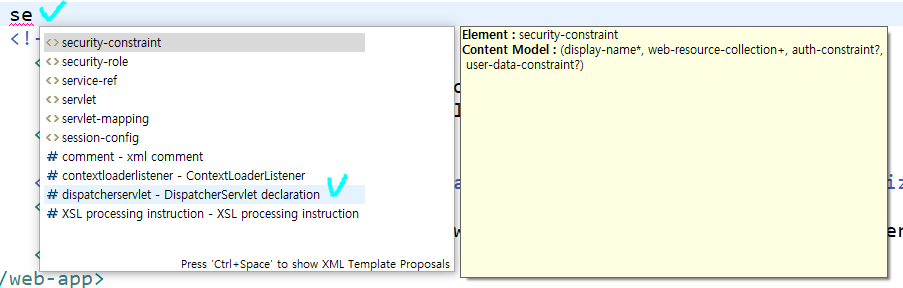
web.xml 에 코드 추가
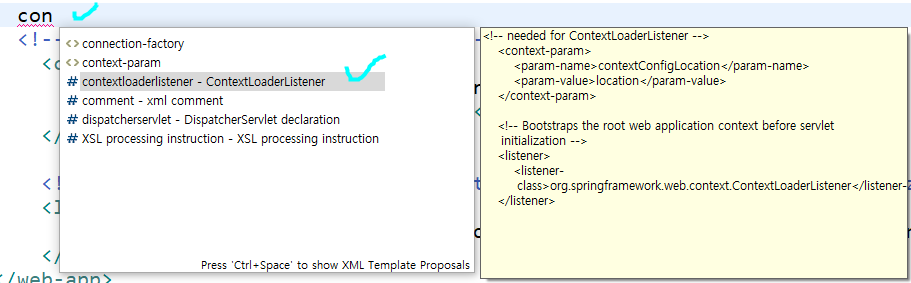
<!-- needed for ContextLoaderListener -->
	<context-param>
		<param-name>contextConfigLocation</param-name>
		<param-value>classpath:beans.xml</param-value>
	</context-param>

	<!-- Bootstraps the root web application context before servlet initialization -->
	<listener>
		<listener-class>org.springframework.web.context.ContextLoaderListener</listener-class>
	</listener>
위 처럼 수정
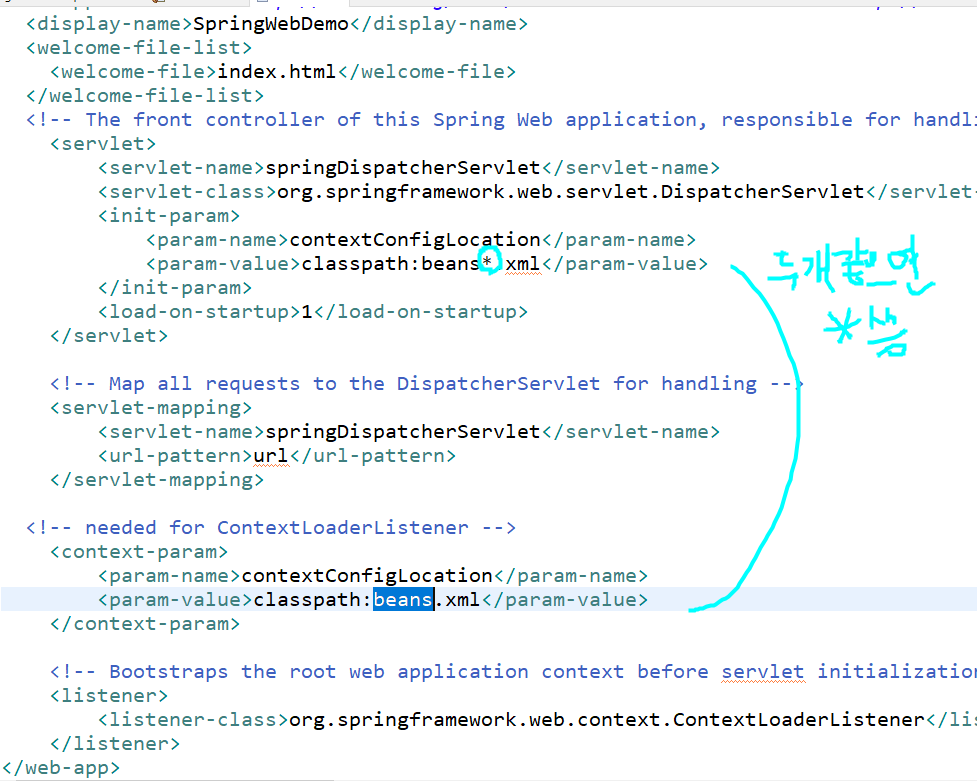
결과적으로 아래와 같아야함
web.xml
<?xml version="1.0" encoding="UTF-8"?>
<web-app xmlns:xsi="http://www.w3.org/2001/XMLSchema-instance" xmlns="http://xmlns.jcp.org/xml/ns/javaee" xsi:schemaLocation="http://xmlns.jcp.org/xml/ns/javaee http://xmlns.jcp.org/xml/ns/javaee/web-app_4_0.xsd" id="WebApp_ID" version="4.0">
  <display-name>SpringWebDemo</display-name>
  <welcome-file-list>
    <welcome-file>index.html</welcome-file>
  </welcome-file-list>

  <!-- needed for ContextLoaderListener -->
	<context-param>
		<param-name>contextConfigLocation</param-name>
		<param-value>classpath:beans.xml</param-value>
	</context-param>

	<!-- Bootstraps the root web application context before servlet initialization -->
	<listener>
		<listener-class>org.springframework.web.context.ContextLoaderListener</listener-class>
	</listener>

	<!-- The front controller of this Spring Web application, responsible for handling all application requests -->
	<servlet>
		<servlet-name>springDispatcherServlet</servlet-name>
		<servlet-class>org.springframework.web.servlet.DispatcherServlet</servlet-class>
		<init-param>
			<param-name>contextConfigLocation</param-name>
			<param-value>classpath:beans*.xml</param-value>
		</init-param>
		<load-on-startup>1</load-on-startup>
	</servlet>

	<!-- Map all requests to the DispatcherServlet for handling -->
	<servlet-mapping>
		<servlet-name>springDispatcherServlet</servlet-name>
		<url-pattern>*.do</url-pattern>
	</servlet-mapping>
</web-app>
src\main\java\com\example\controller\HelloController.java
package com.example.controller;
import org.springframework.beans.factory.annotation.Autowired;
import org.springframework.stereotype.Controller;
import org.springframework.ui.Model;
import org.springframework.web.bind.annotation.RequestMapping;
import org.springframework.web.bind.annotation.RequestMethod;
import com.example.vo.HelloVO;
@Controller
public class HelloController {
@Autowired
private HelloVO helloBean;
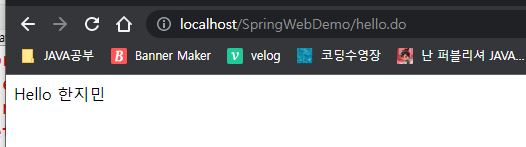
@RequestMapping("/hello.do")
public String hello(Model model) {
String msg = helloBean.sayHello();
model.addAttribute("greet", msg);
return "hello.jsp";
}
}
\WebContent\hello.jsp
<%@ page language="java" contentType="text/html; charset=UTF-8"
    pageEncoding="UTF-8"%>
<!DOCTYPE html>
<html>
<head>
<meta charset="UTF-8">
<title>Insert title here</title>
</head>
<body>
${greet}
</body>
</html>